|
|
EPISODE #111 -
SATURDAY MAY 19, 2012
Getting all
the projects done around the house can be daunting! I recently
found myself in the hammock in the backyard (OK, so it isn’t
‘all work’ around here) and I noticed all the residual pollen on
my deck and lawn furniture. I also thought about the gutters…
when was the last time I cleaned them? Soon I was off the
hammock and back to work again. At least I did get a few
minutes of bliss! Enjoy your spring projects!
Vesper Drink Recipe
Recently we
visited the
Bull
Run Distillery (503-224-3483) and with the warm weather they
shared a cocktail that would work well during these hot days of
spring and summer. Patrick the owner of Bull Run was joined by
Ryan Csanky from the Oregon Distillers Guild to make a Vesper.
This drink uses ‘Made in Oregon’ vodka and gin. We started with
a couple ounces of Medoyeff Vodka and then added about an ounce
of New Deal Distillery Gin and topped it off with about an ounce
of Lillet blanc. This was stirred with ice and strained into a
glass. A twist of lemon gave it a nice hint of citrus. We
watched them make this in the Bull Run Tasting room which is
just a block off 23rd in Northwest Portland. The
room was designed to give the feeling of an old time bar, maybe
something your grandfather would hang out at. It was loaded
with memorabilia of old Oregon and even some ties to
prohibition! If you would like to stop by for a taste they are
open Thursday through Saturday, but will be adding days during
the summer. Check out their website for current times and
directions.
3-Grains
Recently
everyone has been talking about eating healthier. For some that
means adding more natural grains to their diets. Adding them
can be as easy as 1-2-3 and to learn what that means we paid a
visit to our ‘stylishly frugal living expert’, Sara Tetreault,
from
GoGingham.com. She uses a wide variety of grains in her
cooking and she had broken down the prep into some simple
instructions. The first grain was an easy one. Couscous is
delicious and can be ready in 5 minutes. You simply mix one cup
of couscous to one cup of water or broth. Quinoa is another
easy grain to prepare. You need 15 minutes and you simply add 1
cup of grain with 2 cups of water or broth. Quinoa is a
favorite of many because it is gluten free and loaded with
protein. Finally we moved to brown rice. This one takes a
little longer to cook, up to 50 minutes if you do it on the
stove top. Sara uses a pressure cooker and has it done in about
18 minutes. With brown rice you will want to mix one cup of
rice with 3 cups of water or broth.
For storing
your grains you can use a mason jar with a tight lid. This will
keep the grain from getting flavoring from other foods in your
house or kitchen and it will stay fresher longer. It also
allows you to buy your grains in bulk at the store and that will
save you money!
Finally,
Sara shared a recipe with us. She made a quinoa salad. She
simply mixed in baby shrimp, cucumbers, tomatoes, onion,
cilantro and garlic, and mixed it with lime juice and olive
oil. It was fantastic! For more frugal tips you can check out
the GoGingham
website!
Aging in Place
As the
holiday season approaches we start to think about getting
together with family. It also creates concerns as we have to
think about our older relatives and making sure they are
comfortable and safe in our houses. As we age we don’t think
about how we need to change our surroundings to accommodate our
limited mobility or other physical needs.
Neil Kelly
(866-691-2719) has a program for remodeling homes called ‘Aging
in Place’, which was developed with the Home Builders
Association and the AARP. We met with designer Barbara Murphy
who works with people to help make these important modifications
to their homes for themselves or for other family members. We
toured one of the kitchens and looked at some of the
modifications that they can install. The first one was a
dishwasher that wasn’t as deep as a normal one. This allows you
to load and unload the dishwasher without bending. Another
modification was a cutting board that pulls out to become a
table so you can actually sit down when using it, plus it was
built to hold the weight of a person in case they need to lean
on it. Finally we looked at a spice rack that was located near
the stove so you don’t have to reach up or move around the
kitchen to find your common spices. We even saw how they can
place dishes and glasses in specially designed drawers to make
them more accessible.
We then move
to a demonstration bathroom to see what you can do there to make
things safe. The first thing to think about is the shower.
Neil Kelly can install a shower with no threshold so there is
nothing to trip over when you step in. She also mentioned the
adjustable shower heads that can be moved up and down in case
you are seated in the shower. There are also push button
temperature controls so the water will not get too hot or too
cold for the person using it. You will also need to consider
the installation of grab bars and other tools for assisting with
balance. The good thing is that most of these improvements will
help increase the resale value of your home.
The reasons
for hiring a designer are many. The Neil Kelly design staff is
up to date with some of the newest innovations and has constant
training in the newest ideas for ‘Aging in Place’. They also
work with many vendors so you can often see significant savings
in products. Plus they do this everyday and so they know all of
the common mistakes that the do-it-yourselfer would make and
help you avoid them! It also doesn’t have to be expensive and
they can walk you through the budget process so you are
comfortable with the overall cost. And since this is a safety
issue you want to make sure it is done right, and Neil Kelly can
make sure that happens.
Estate Sale Tips
If you are
going to an estate sale it can be tiring and confusing. To get
some tips for shopping these sales we stopped by
Gary Germer and
Associates (503-235-0946) to ask Gary for some help. To
start he mentioned that he has 5 things you need to bring with
you. One, bring some cash and a checkbook. Most sales do not
take credit cards and if they do they require a large purchase
for you to use one. It also helps you stay to your budget.
Next bring a magnifying glass. This will help you look at items
up close and see if they are real or fake. With a glass you can
see if a painting is a real painting or just a print. Experts
also use their looking glass to check out jewelry. If it is
real gold or silver it will be marked. You can make a lot of
money by getting something cheap and having it melted. The
third thing is hand sanitizer. You are touching a lot of stuff
that belongs to other people and it may have been in the attic
or the basement. You will want to clean your hands! Fourth,
bring just one friend. With one friend you can act as a team
and make sure you stay on track. They can also act as a
navigator when you are driving. You don’t want to be herding a
large group of people! Finally, bring water and snacks. If you
are a shopper you know that time can slip by and soon you are
hungry and grumpy. A little food and water goes a long way!
Next Gary
gave us some shopping tips for success. Gary had 5 tips here
too. First, don’t be a jerk. Treat people at the sale with
respect. Even if you are bartering, be polite. They will be
more willing to barter if you respect them and the place you are
visiting. Tip number two, Do you homework. If in doubt,
don’t buy. What Gary means is that if you are shopping for
stuff; know what the market is for that item. If you are going
to buy a guitar, make sure you know what guitars are selling
for. Third tip, plan a route. This will save you time, money
and energy. Look at sales in the paper and on-line (craigslist
is a good source), and then make a route. Number four; make a
shopping list of wants. If you are looking for ordinary
household items you can find them at these sales. You can also
find gifts. Look for new or slightly used items for friends and
family. Just don’t brag over how much you saved. Finally, tip
five, come back early on the last day. If you have been to a
sale and something seemed too expensive on the first day, come
back on the last day and the dealer may be willing to take an
offer. Sometimes dealers will even have ‘half-off’ sales on the
last day.
If you do
find a treasure and you need some help with appraising you can
contact Gary, or stop by his new store for a treasure he found!
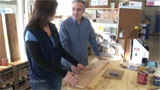
Staining Tips
Doing home
projects can either come out looking like a pro did them or they
could end up looking kind of yucky. Staining wood is one area
where you don’t want to botch the job. To learn how to do it
correctly we stopped by
Parr Lumber
(866-214-7277) and talked to Amber, one of the store managers.
Amber told us that the best way to make your staining job look
good is to follow certain steps and not to skip them. First she
started with a piece of wood. The key is to make sure you sand
it down. Even if it looks like it is smooth, it may have small
marks from the machining and cutting it went though. If you are
looking for sandpaper, the number gets higher as the grit gets
finer. You will be using a medium grit of 220 for this type of
sanding. You start sanding, going with the grain of the wood.
Make sure your work is even across the whole board. When you
are finished you should not feel any rough spots on the wood.
Next, take a tack cloth and wipe off all the dust. A tack cloth
will feel sticky and it will not leave a residue on the wood.
Once the wood is free from dust you can apply a Pre-Stain Wood
Conditioner. The conditioner closes the pores in the wood and
gets it ready for the stain. It actually helps the stain work
better. Once again you work in the direction of the grain.
This will also prevent your wood from looking blotchy once the
stain is applied. Finally, after the Pre-Stain is dry you can
apply the stain. Make sure you are in a well ventilated area
when you start. You start by applying a nice light, thin
layer. If the color is too light you can always apply a second
coat. Remember to read the directions before you start so you
know how long you should wait between coats. Amber showed us 3
examples of what it looks like if you don’t follow the right
steps. The board that was just stained without the sanding and
Pre-Stain looked terrible! Of course, you don’t have to worry
about doing a terrible job! With help from the experts at Parr
Lumber you can get it right the first time! |
   
 |
||||||||||||
|
Website design and content ©2009-2012 Gustin Creative Group.
Please send website inquiries to
gustingroup@comcast.net. |